You may sometimes get bored with MS Word of (rarely) LibreOffice Writer. There is another document editor which is more likely to programming! LATEX!
In this tutorial I will show how to install LATEX in windows with TexStudio editor, step by step with pictures.
Configuring LATEX for Persian Text
Steps:
- Download and install Miktex
- Download and install TexStudio
- Download and install Persian fonts
- Start a new document with XePersian packages
- Compile the document with XeTex
Download and install Miktex
For the first step you should download Miktex from the main repository and install it on your system. I suggest to install for your account and choose the default directories for installation.
You may face such error in the last steps. It is all right. The fix is here:
Miktex has some fndb databases (4 files) which should be deleted and the installer fails to delete them. You can delete them manually. The folder is here (if you do not changed the default directories in installation):
%appdata%\Local\MiKTeX\2.9\miktex\data\le
After removal, execute miktex update in here:
%appdata%\Programs\MiKTeX 2.9\miktex\bin\x64\internal\miktex-update.exe
Miktex will select which packages needed to be updated. Just update them.
Miktex is installed successfully! 🙂
Download and install TexStudio
Among the document editors I prefer TexStudio. I’ve tested followings:
- TexMaker Second best one!
- Notepad++ LATEX template. A good tutorial is this link.
- lyX Graphical LATEX editor
Find the Comparison of TeX editors.
But the steps to install TexStudio is quiet easy:
After installing you can run the TexStudio and write your first document! It will work with no errors. But if you want to use XePersian for Farsi text, You should do more steps.
Download and install Persian fonts
The fons are started with XB => XB Yas, XB Zar, etc
You may download the fonts where you want but this link provides good fonts.
Download the fonts you want and install to windows fonts directory.
Start a new document with XePersian packages
Just start TexStudio and create a new document.
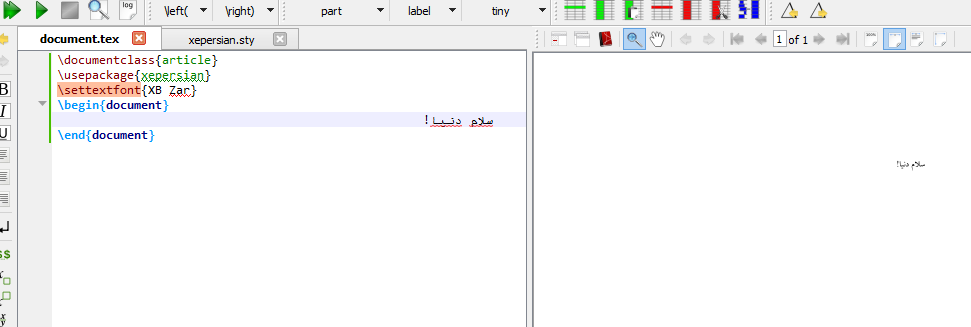
Basic commands for XePersian are:
\documentclass{article}

\usespackage{xepersian}

\settextfont{XB Niloofar}

\begin{document}

سلام دنیا!

\end{document}
If you just click F6 (compile command) in TexStudio it will ask you for download permission of extra packages.
Compile the document with XeTex
After downloading all necessary packages, you may face another problem like below:
XePersian uses XeTex for compile. So you should use following compiler in TexStudio:
Tools => Commands => XeLaTex
It will compile correctly! And if you to permanently change the compiler, do as below:
Options => Configure TexStudio => Build tab => XeLaTex as the default compiler
Everything is OK now! Happy XePersianning 🙂


thank you
Hi
how can we set scale in Textstudio when we type inpersian?
In viewing the text or compiled pdf?