By means of IoT lots of things can be connected and controlled by Internet such as smart homes. In this small tutorial I will discuss about personal smart home solutions and how to remotely control them. In small word “Control your Home IoT System over TOR” 🙂
Solutions
For making your home smart and IoT there are multiple solutions. Google Home, Amazon Echo, Apple Home Kit, are some of the examples. Beside, open source projects can be used to install smart home equipment such as Hassbian or generally Raspbian.
Installing Raspbian Virtually
Here I will discuss about installing Raspbian virtually. It should be mentioned if you need to install Raspbian you do not need to install it on RaspberriPi, alternately you can install it virtually. But you should use special emulators for running Raspbian, since it is compiled in ARM architecture not in Intel x86 or AMD x64 or etc.
I will follow instructions from azeria labs to install virtual Raspbian on QEMU emulator on Ubuntu 16.04 x64.
Install qemu-system in Ubuntu
sudo apt-get install qemu-system

Download Raspbian and Kernel
Download Raspbian and the kernel for the emulator. For this tutorial I’ve used Raspbian Jessie from this link, QEMU rpi kernel can be downloaded from this link. I’ve downloaded 2017-07-05-raspbian-jessie.zip (Raspbian) and kernel-qemu-4.4.34-jessie (Kernel).
Then unzipped the Raspbian:
$ unzip 2017-07-05-raspbian-jessie.zip.zip

Archive:  2017-07-05-raspbian-jessie.zip
  inflating: 2017-07-05-raspbian-jessie.img

$ fdisk -l 2017-07-05-raspbian-jessie.img

Disk 2017-07-05-raspbian-jessie.img: 4.3 GiB, 4661483520 bytes, 9104460 sectors
Units: sectors of 1 * 512 = 512 bytes
Sector size (logical/physical): 512 bytes / 512 bytes
I/O size (minimum/optimal): 512 bytes / 512 bytes
Disklabel type: dos
Disk identifier: 0x970b8044

Device                          Boot Start     End Sectors  Size Id Type
2017-07-05-raspbian-jessie.img1       8192   93596   85405 41.7M  c W95 FAT32 (LBA)
2017-07-05-raspbian-jessie.img2      94208 9104459 9010252  4.3G 83 Linux
As you see above, (the last line) img2 part start from 94208. 94208 x 512 = 48234496 (bytes).
$ sudo mkdir /mnt/raspbian
$ sudo mount -v -o offset=48234496 -t ext4 2017-07-05-raspbian-jessie.img /mnt/raspbian
$ sudo nano /mnt/raspbian/etc/ld.so.preload
And comment out every line starting with '#'

$ sudo nano /mnt/raspbian/etc/fstab
From Azeria Labs:
IF you see anything with mmcblk0 in fstab, then:
- Replace the first entry containing /dev/mmcblk0p1 with /dev/sda1
- Replace the second entry containing /dev/mmcblk0p2 with /dev/sda2, save and exit.
Finally unmount the image.
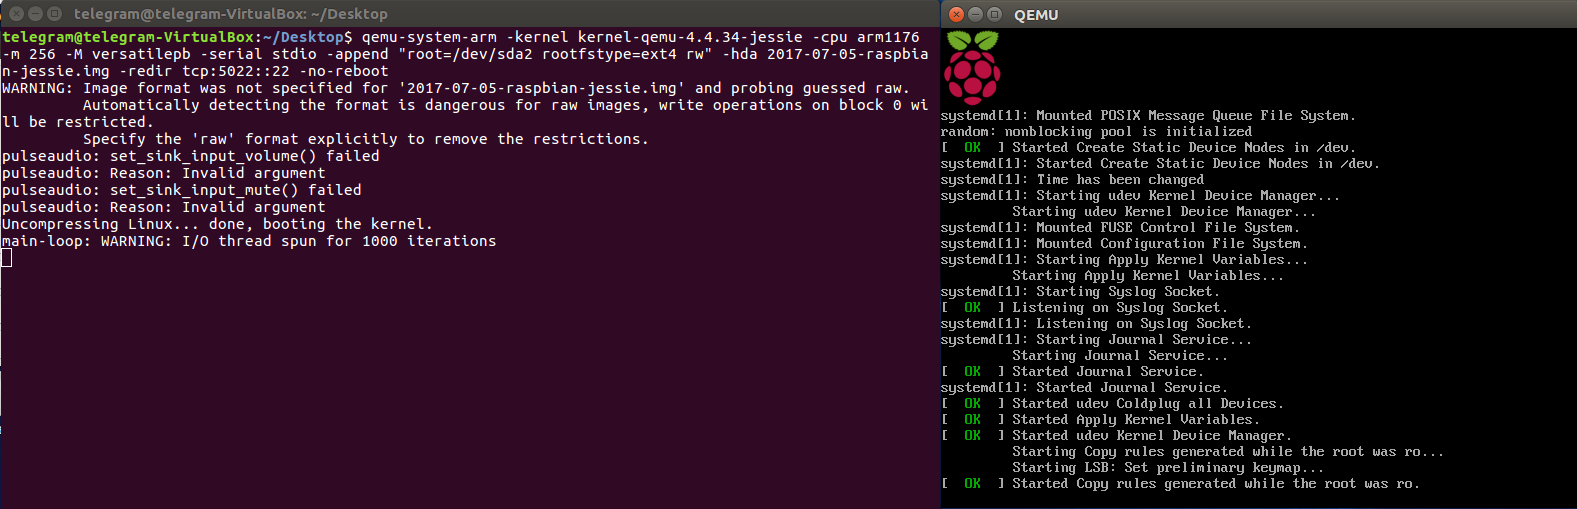
$ sudo umount /mnt/raspbian
And run qemu with the following command:
$ qemu-system-arm -kernel kernel-qemu-4.4.34-jessie -cpu arm1176 -m 256 -M versatilepb
-serial stdio -append "root=/dev/sda2 rootfstype=ext4 rw" -hda 2017-07-05-raspbian-jessie.img
-redir tcp:5022::22 -no-reboot
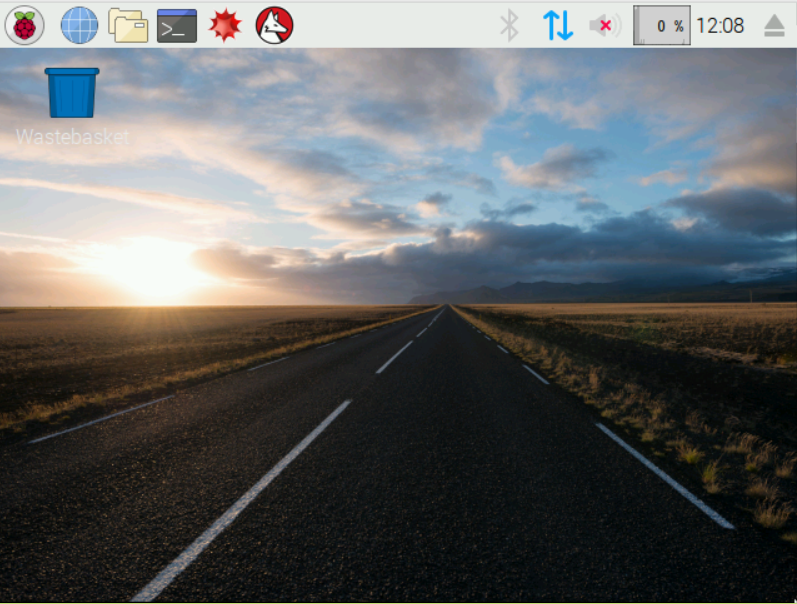
As you will see, the QEMU will start Raspbian. It is just like you’ve write the Raspbian image on sdcard and insert to your RaspberryPi. Now the OS is ready.
Starting the Raspbian:
And vola:
You can enable ssh using
sudo service ssh start
Then you can connect using
ssh [email protected] -p 5022
Default user is pi and password is raspberry.

Remote Control Alternatives
For the aim of remote control, there are some scenarios.
1) Using MQTT like protocols. In this scenario, your Smart Home solution is behind NAT and can send data to a public MQTT server (or your private one) but you cannot send and receive massive data such as remote desktop.
2) Opening ports in your router or modem (or somthing like UPNP). But this is risky and you should open direct access to your system.
3) Another alternative to avoid port forwarding, and send large data is using TOR hidden services. It allows to connect to your IoT system indirectly behind NAT.
Installing TOR and Hidden Service on Raspbian
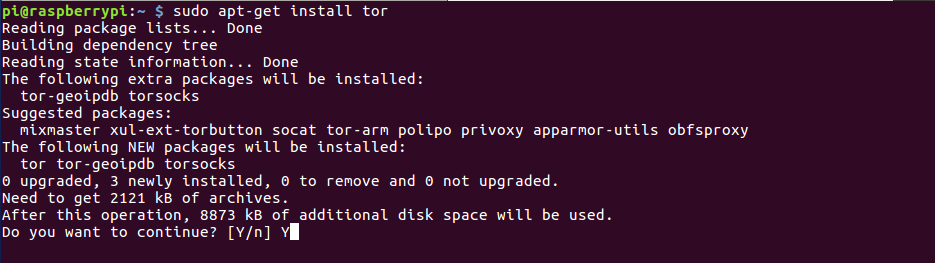
Raspbian is just like debian or ubuntu and its repository is full of ARM compiled software such as TOR. Install TOR on your system using the following command:
$ sudo apt-get install tor
You may change your time zone and run following command to sych the Raspbian time:
$ sudo sntp -s time.nist.gov
After installing tor, you should config the hidden service. Edit /etc/tor/torrc with nano:
$ sudo nano /etc/tor/torrc
And add the following lines:
HiddenServiceDir /home/pi/Desktop
HiddenServicePort 22 127.0.0.1:22
HiddenServicePort 80 127.0.0.1:6008
And save the file using CTRL+O and then CTRL+X to exit. Then restart tor using sudo service tor restart && tor as follows:

Now you can find your onion address in /home/pi/Desktop/hostname. It is 16 characters which will be ended with an “.onion”.
SSH
SSH is almost done. Just config your client (outside your network) to connect to onion address:
Install proxy-connect in client:
$ sudo apt-get install proxy-connect
and change the /etc/ssh/ssh_config file and add the following lines:
Host *.onion
    ProxyCommand connect -S localhost:9050 %h %p
save the file and enjoy using SSH over TOR. In my case:
ssh [email protected]
Everything is OK. I can connect from everywhere to my home IoT Server.

In my next post I will describe the remote desktop access to Raspbian. 🙂